This is a basic 4 forward 4 back pattern that I took from http://malarkycrafts.blogspot.com/2012/12/holiday-bands.html
because I needed something quick and easy to weave for my boyfriend’s mom for
Christmas.
I know several people have a hard time warping their loom if
they can’t do a speed warp, so I figured I would document how I do it. As with everything else, there is no one true
way, but hopefully seeing pictures of how I do it will help.
I use my loom as a warping board. My other looms have projects on them, so I just had my daughter's loom available, but wanted something longer than it makes. For extra length, I usually use a chair placed however far away I need it, but it is actually easier to get a consistent warp length just using the loom. On this loom, I wrapped around the top center peg, to the back peg, then to the bottom center peg, and back to the end peg, before also wrapping around the base. In case it is not clear from the picture, the back peg has two sets of string wrapped around it, and they also cross when they wrap around the base (this won't actually be a problem). To determine the number of strings of each color, I count the color blocks on the pattern, and make sure I wrap that number of each color. Make sure you are consistent each time you wrap, otherwise you will wind up with some strings that are much shorter. If you catch this, just add an extra wrap, and consider the short piece waste. I cut my strings just in front of the base board, because that is where I initially tied off. When you cut, make sure to hold the strings between the front peg, and the place where you cut. Otherwise they tend to react messily to the lack of tension when you cut. Once you cut, remove any knots holding individual strings together, then tie all of the strings in a loose knot to keep it from becoming tangled. I usually do this every two to three feet.


I wrapped around one of the bars twice. Believe it or not, this is not a problem, as long as you went there from two different pegs.


Use one hand pressed flat against the ones on the floor to keep them from moving as you continue to separate the ones you want. Avoid combing the threads, just lift them a little at a time, until the threads you want are in their own group.


With the strings you selected laid out straight, thread each card, and tie the ends you just threaded together. For this pattern, you can ignore S and Z, until the strings are attached to the loom. I usually transfer blocks of four cards onto the loom at one time. I don't want to waste string, so I use a doubled string passed just behind the knot (two threads above, two below) to tie the beginning onto the loom. I lay the cards in the working area, attach the extra string to the closest peg, then loop the rest of the string around the first peg, tie to the second peg, and wrap as normal until I get to the last peg. This peg I knot around twice. The knots will help keep your tension tight. Repeat this process until you have all of your cards attached to the loom. In this pattern, I have 24 cards, so I did 8 blocks of four cards, but you can do them in whatever blocks work best for you. I'm going to assume anyone reading this knows how to follow a pattern, so flip the cards to S or Z and rotate them to put the A color in the top hole closest to you.


Because I purposely made a longer warp, I am going to have extra string, so I use a daisy chain to keep them from tangling. To start, you are basically going to make a partial slip knot. Lay the extra strings over the back of your hand, and place your fingers over the strings coming from the loom. Now roll your hand to make a loop, and use your fingers to grip the loose string, bringing a loop of it through the loop you just made. Now with your fingers still through the new loop, bring another section of the loose string through, making a new loop. Continue doing this until you run out of loose string. When the remaining string is too short to make another loop, bring the entire remainder through the loop to lock it in place. You can also just leave it as a loop, but if you pull on the string remainder, the entire chain will unravel. Which is what you want to have happen, but not until you are ready to shift the strings on the loom.


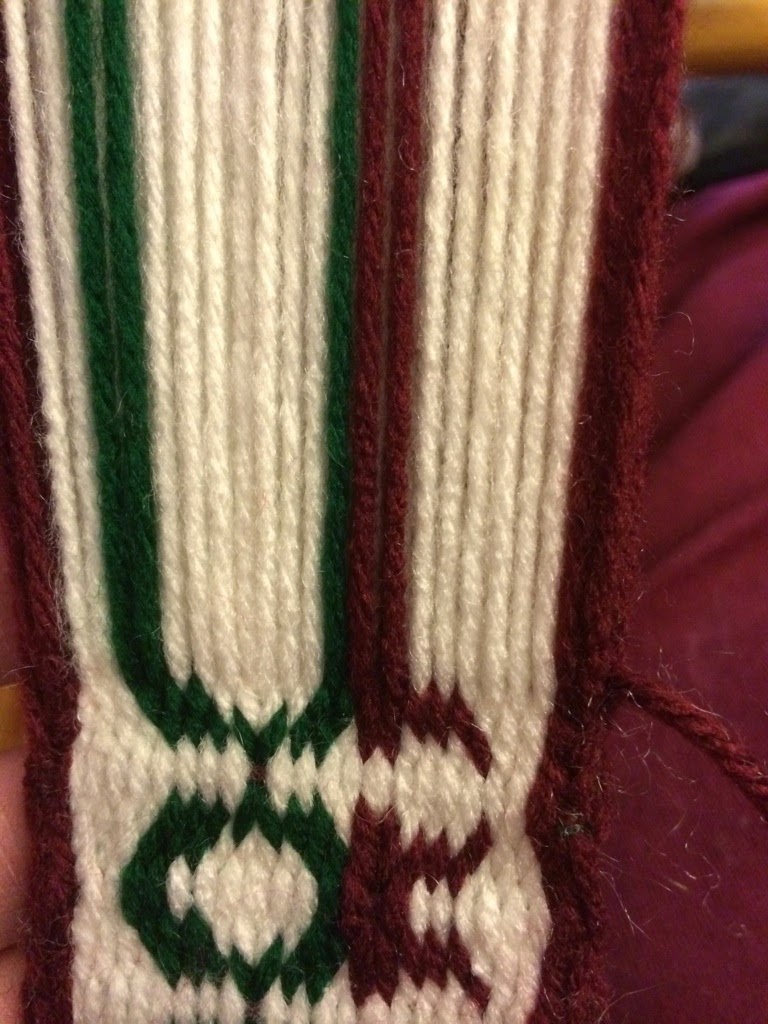
This is what the finished pattern will look like. Most patterns don't tell you if you should start rolling your cards forwards (away from you) or backwards (towards you). It doesn't really matter which direction you start, because looking at your weaving will tell you which direction gives which half of the pattern, and most people require at least an inch or two to set the width of the band. You can use toothpicks, or waste string to make it easier to remove this section from your finished band. I have a very good idea of my finished tension, so I just pull the first two weft passes tight. I suggest practicing this with your toothpicks or waste string, so eventually you won't have to unweave the beginning of your bands. Most of the time that you have a border, you will want to keep those cards rolling in the same direction as long as possible. However, 4F/4B on the border will still lay flat, so make it easier on yourself, and just keep them moving with the rest of the pack. I pulled a bit tighter on my weft when I changed directions, because I wanted the edge to look more scalloped.


You have run out of working space, now what?

First tie your cards together. I lay the string on top, cross at the bottom, then tie them on top. This holds the cards pretty tight, but you can also use a large safety pin, or whatever else you have come up with to keep the cards from moving while you aren't weaving. Then untie it from the loom. Because this is a 4F/4B pattern, there is no twist build up, so nothing needs to be combed out. Therefore, I leave the second peg knot, but loosen it so it can be moved along the strings. As an added benefit, it keeps it obvious which strings belong to each set of cards. Reattaching the strings to the loom is done the same way you initially did it, but you may need to add some extra string to have your beginning reach the next peg. One the beginning is reattached, I slip the knot back around the second peg, then tighten everything up, knotting twice around the last peg. I leave the daisy chain until I need the extra string to be able to knot around the last peg, then if I still have extra, I re-chain it.

Once everything is reattached, go back to weaving until you once again run out of working area, then repeat. Yes, it is a pain to have to keep moving the working area, but that is the price you pay for the convenience of carrying your project around on an inkle loom, and it gets pretty fast after you have done it a few times.