Wednesday, July 18, 2012

Stazi's double face lightning bolt

A while back I had some string left over after teaching a class.  I had purposely put on colors to make a test swatch for Stazi that she could use on an apron, and see what I was proposing for her belt.  Recreating a piece you chose to doodle is interesting.  I knew how many cards, and which colors were in which card.  However, I forgot that I had set up this pattern alternately threaded S and Z, and set it up as half S and half Z.  It did not look like I remembered, so I backed it out and started over.  Thankfully looking at the picture I took made it obvious what I had done.

I did not bother charting the pattern, because it is really simple.  Instead I am writing exactly what I did.  A while back I charted a dragon for someone who had never done double faced card weaving, and wound up giving them row by row directions for the first few rows.  This helped her understand what to do with the chart.  Charts are great for complex patterns, but I think charting very simple patterns is a waste of time, because it distracts you from letting the threads tell you what to do next.

On this piece, I chose to flip cards on their vertical axis rather than rolling my cards.  I find this easiest, but you can substitute with rolling the cards twice, or changing the direction of the cards (see my previous post of double faced weave, if you want clarification).  In the flipping method all but the selvedge (edge) cards move together as a group.  I have no problem keeping track of my cards, but I am lazy, so I prefer to move them as a group.  Selvedge cards roll in the same direction for long stretches, until you reverse their direction to remove your twist build up.  Selvedge cards will keep your weaving flat, though they are not always necessary.  I use the edge ground card (in this case green) to tell me which direction to go.  Once it reaches the closest position (ground color in the 2 holes next to your body), it rotates forwards (away from you) until it gets to the furthest position (ground color in the 2 holes furthest away from your body).  At that point it rotates backwards (towards you), until they are back in the closest position.  You can always tell which cards you are making a pattern with, because they will have the design color in the holes that normally would have the ground color.
 
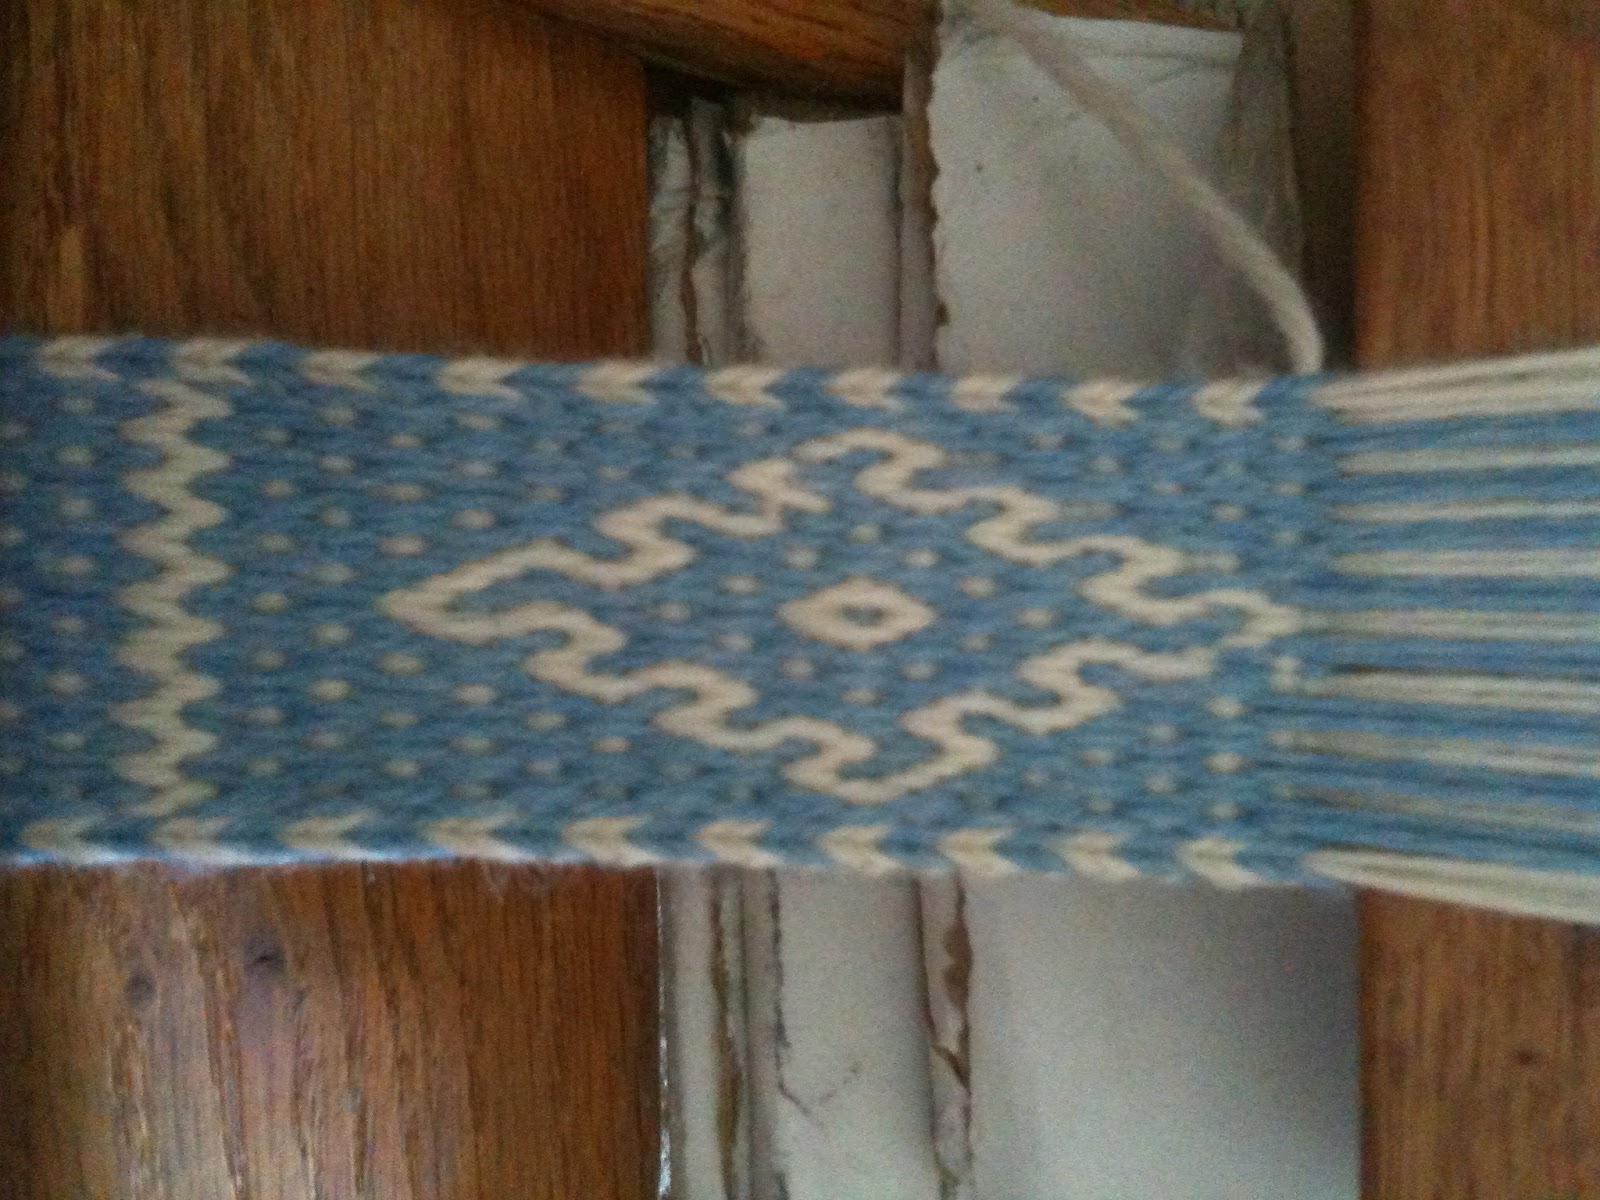
This piece is 20 cards wide.  Two selvedge cards on each side are yellow, with the remaining 16 cards threaded half white, and half green.  The cards are alternated S and Z across the band.  I wove about an inch of basic ground before starting the lightning bolt.  The white and yellow are wool yarn, the green is 75% wool/25% silk yarn.

With the ground color in the closest position, flip the center two cards on their vertical axis.  Weave two more passes as if you were just weaving the ground.  You should have the other color showing up in the middle of your band.  You should be at furthest position, now flip one card on either side of the 2 middle cards, and weave two more passes.  Aside from the starting color change, I use the cards with white in the holes to tell me where I am in the pattern.  In this case all the furthest holes should be green except for the two center ones which have white in the furthest holes.  Continue this process adding one card to each side, until you have only two cards of the ground remaining on either end.  These two end ground cards will never flip in this pattern, and will tell you what the original position is.  Flip all but the center four on their axis again (this will be the four cards cards on each end, after you skip the two on each end still in their original position), and weave two passes.  You should now have an arrowhead with the beginning of a shaft.


I continued to weave without making modifications to the cards to give me a line in the center.  When I had six floating stitches (long straight white threads) in the line, I flipped the four cards to the right of the center cards, and wove two passes.  Next I flipped the center four back to their original position, and wove two more passes.  This gave me a turn in the line, and the line has now moved to the right side of the band.  I wove the line until I had six floats, then flipped the eight cards to the left of the current line, and wove two passes.  This gave me a line across the band.  To move the line to the left side of the band, I left four changed on the left and flipped the eight to the right of them back to their original position.

I wove until I six floating stitches, then flipped the eight cards to the right to give me another line across the band, and wove two passes.  Then I flipped eight cards from the left back to their original position.   The line will now be on the right of the band.  Once again I wove till I had six floats, then flipped four cards to the left of the four, and wove two passes.  I flipped the four on the right back to their original position, so my line will be back in the center.  I wove until I had six floats, then flipped four cards on either side, and wove two passes.  Once again I have a line across the band.  Then every two passes I flipped one card from the end back to the original position, until I had a solid green ground again.


Tuesday, July 17, 2012

Hochdorf

I've wanted to try this technique since I first ran across Guido's write up several years ago.  http://www.steinmaus.de/Mittelalter/weben/anleitung/pebbleweave.html

There are also directions at http://thewarpfactor.blogspot.com/2012/01/hochdorf.html and http://www.b-oberholz.de/editor/druckansicht.php?id=297 but they are threaded differently.  Instead of all S, they are threaded SSZZSSZZ...  I decided to try Guido's technique first even though the alternating SSZZ threading means being able to move the pack all in the same direction rather than alternating two forward and two back.  I did this so I would better be able to understand his section on drafting patterns.  Since I am including the directions that I followed, I am going to write what I noticed rather than complete instructions.

I threaded two selvedge cards for each edge with four threads two white, and two blue.  I then threaded 32 cards with one blue and one white thread in opposite corners.  All except the selvedge were threaded S. I chose the blue as my guide color and the first card had blue in A position, with the blue thread rolling placement around the following cards just like in diagonals.  Card two blue was in B, card three in C, and card 4 in D.  This results in the first two cards having blue in the holes closest to your body, while the next two cards have blue in the holes furthest from your body.  This alternates across the pattern section of the band.

The first problem I ran into was keeping my cards from turning without my guidance.  Because the pattern cards are only threaded in two holes at opposite corners (ex: A and C holes) the thread rolls the card resulting in an empty hole sticking straight up.  This was solved by making a card board rest to keep my cards from rolling.  I also found that wooden cards work much better for this technique since they are stronger and not as slick as my playing card ones.  I'm only using a few playing card ones at the ends, and they are still driving me crazy and getting a bit mangled.  And you really want to tie your cards together when you walk away from the loom.

This technique is basically double faced weave moving two cards as one.  To weave the ground roll the first two cards away from you, and the second two cards towards you.  You should have all blue on the top.  Pass the weft and do this again also passing the weft.  Then reverse the turning direction to the first two cards rolling back towards you, and the second two away from you.  Just as you can in double face you know you are going the wrong direction if your floating thread doesn't get pulled back into the weave.  Rather than trying to keep track of which direction I was supposed to be moving my cards, I rolled them in the direction to bring blue to the top holes, then test rolled my first two cards till I knew which direction pulled them back into the warp.  If forward was the right direction I then rolled the second two cards backwards repeating this across the band.

To make the zigzag bring white to the top of the cards instead of the blue.  Then move them back to the home positions.  Go back to bringing the blue to the top.  I made sure the center four cards came to a downward point in the zigzag.  This helped me to know which four cards start the base of the actual pattern without having to count in from the sides.  The pattern needs to start when your blue floating threads are not in the center most position, or the slant will be wrong.  If you don't get a V, back it out, weave one more segment of the ground, and try again on the next line. 

I just used the outline section of the chart from the third website I posted, and ignored the rest of it.  Amalie's chart was great, but it was hard to just use it for the outline because I think I really wanted to change my warp to alternating SSZZ, so I kept getting confused.  When I needed a white line I slid the cards that would be white slightly to the front of the pack.  For me this is easier to slide them back into the pack later.  Just as in double faced you only change colors when the cards are in home position, but instead of adding additional rolls or flipping on the vertical axis you just roll the color you want to the top of the card.  If you get lost in the pattern, home is always two blue in the front or back holes alternating across the band.  This is true even when you have been changing to white, and helped me keep track of the pattern.
 Sliding the cards slightly forward.
 The zigzag.


 I have two errors here.  Just below the middle on the left side, and just before the top of the pattern.  Both of these were due to letting my cards get out of order, and how I figured out that the two blue in front then two in back needed to stay constant across the band when in the home positions.

This is what the pattern looks like if you just roll it all backwards.


Monday, July 9, 2012

Card weaving on a budget

I have a class coming up Saturday, and I figured I would post some suggestions for trying this without a lot of initial expense.  Yes I will have ten cards for each student, and some c-clamps on hand, but I know I am not the only one who prefers to have everything I need before I show up to a class.

No Loom:
You don't actually need a loom.  They make it easier to transport your piece, but they tend to be an expensive item if you wind up not enjoying it.  You can tie it to your belt at one end and a table leg at the other end, but this can be a hassle, if you need to get up.  In my class, I use 3" C-clamps, which work well on most tables, and if no table is available you can clamp two onto a board.   The string is tied to the screw part, so the cards are suspended between two points (basically a really tiny Oseberg loom).  The same thing can be done using pillars, a chair, cardboard box, etc...


No Shuttle:

Wrap your weft string around a piece of cardboard or an empty toilet paper tube, and use a ruler as a beater.  I prefer the wooden ones with a bevel, or a metal edge.  The cardboard or TP tube can be used as a beater, but it doesn't last as long.  


No Cards:

Probably the easiest way to make cards is to use a deck of playing cards.  Use a sideways card to mark a square.  Cut off the excess.  Once I have a square card, I use it to mark the rest of the deck.


 Then mark 1/2 in from each corner.


 Use the x as your marker to punch a hole with a hole punch in each corner.  Once you have one with four holes punched, I use it as a master to punch other cards.  You can use the hole punch through the holes, or trace the holes onto the unpunched cards.


My apprentice Will discovered a faster way of punching the cards, using a two hole punch on the opposing edges of the card.  You can punch more cards at a time, and consistent holes require less effort.

Fiber:

I recommend starting with cotton crotchet thread because it is not at all sticky.  Try to avoid the one with the metallic wrap as this will probably get mangled as it passes through the cards.  Sometimes thrift stores have bags with yarn, etc...  Otherwise you can usually find these pretty cheap.  You need two balls each of two colors in order to speed warp.  If you want to only buy one ball,  wrap about half of it onto an empty toilet paper tube, so you have two spools.  Obviously, I recommend doing this before class starts. :)